| |
以下是教學內之片斷,按下圖可看放大圖.
Lesson contents below, click the images to expand them. |
|
| Introduction |
學習主旨
Lesson Keynote: |
 |
Introduction + Download
> The core concepts
> Common to all Revit elements
> What is BIM
> Bim and 3D
> Interface
|
|
| Basic Setup |
學習主旨
Lesson Keynote: |
 |
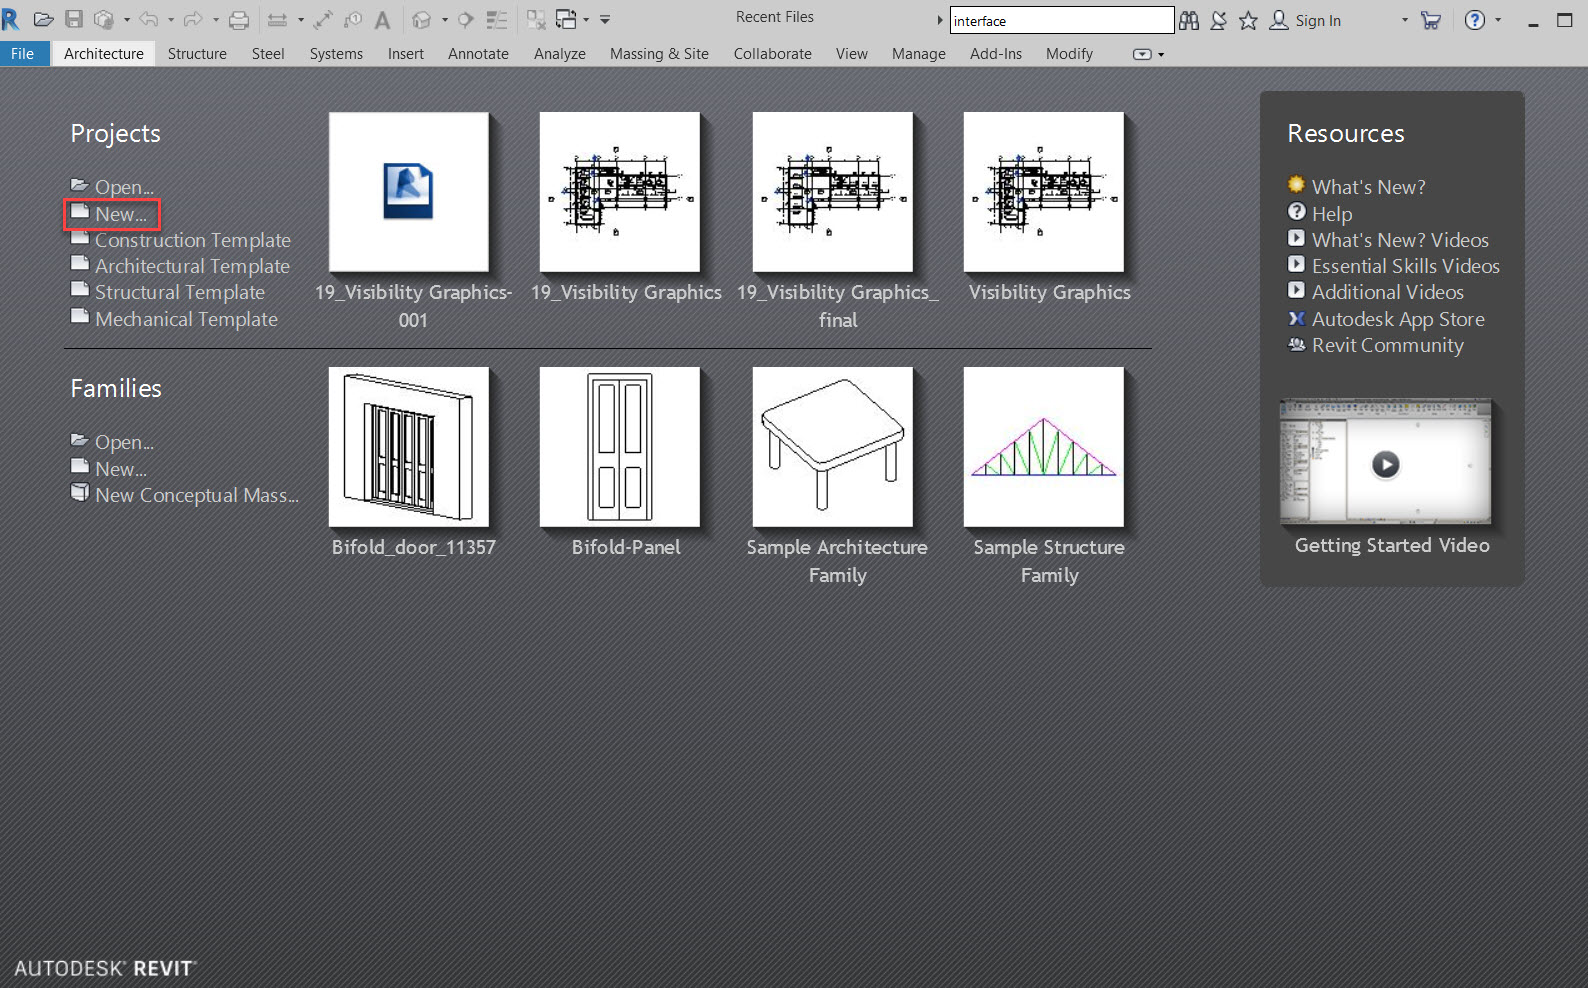
Basic setup
> Create new project
> Setup Title block
> Project information in Sheet
> Project location
|
|
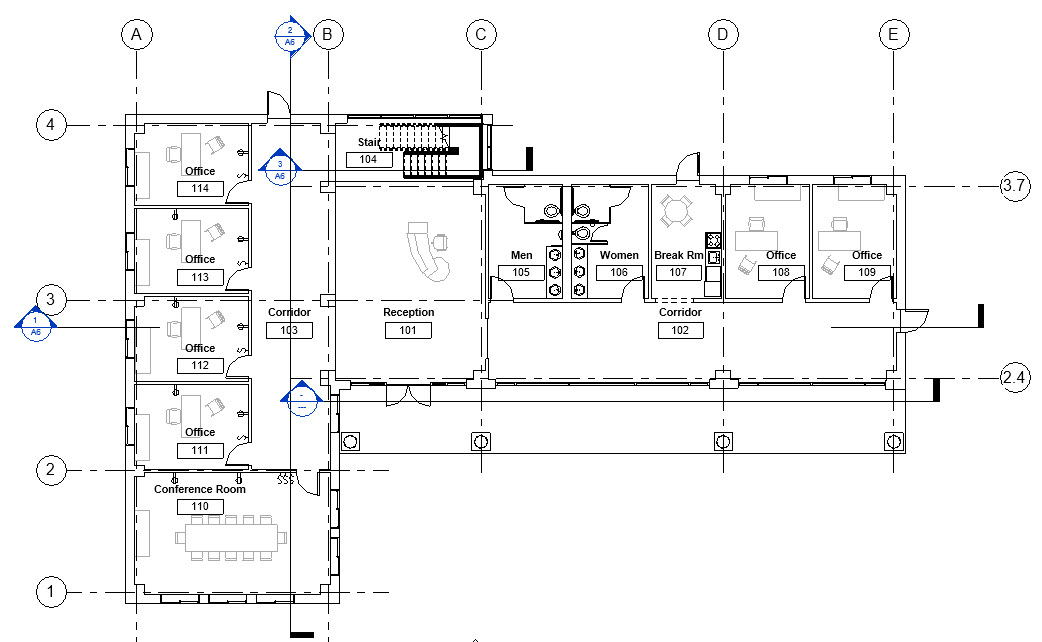
| Levels |
學習主旨
Lesson Keynote: |
 |
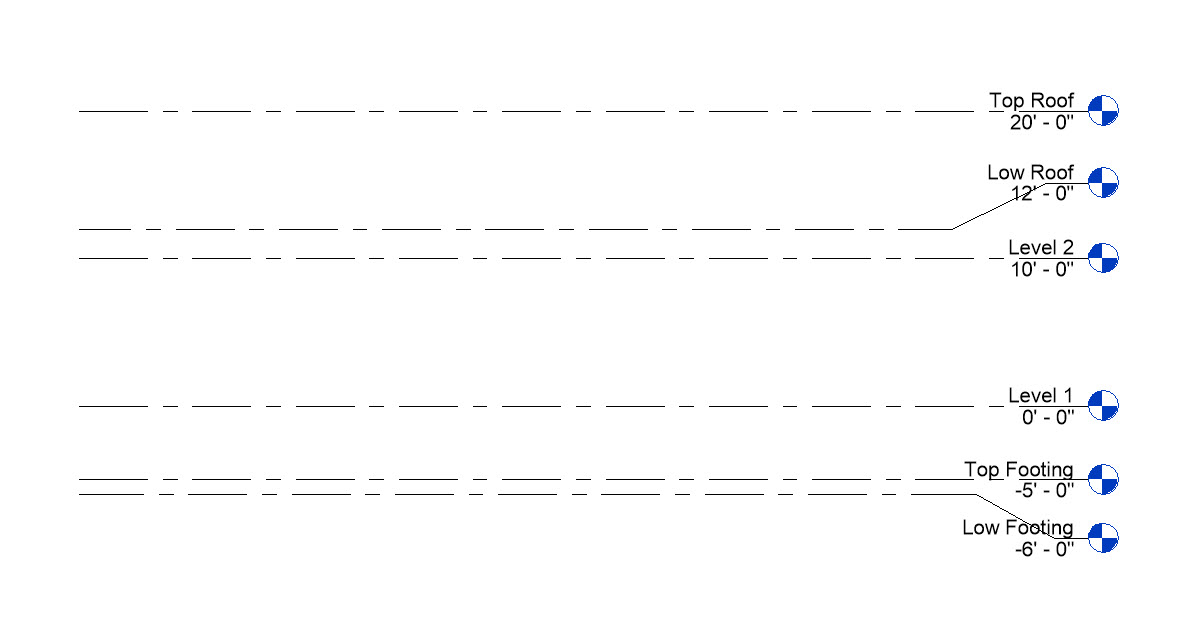
> Setup Levels in elevation view
> Modify Level Datum: name, height, symbol, display
|
|
| Grids |
學習主旨
Lesson Keynote: |
 |
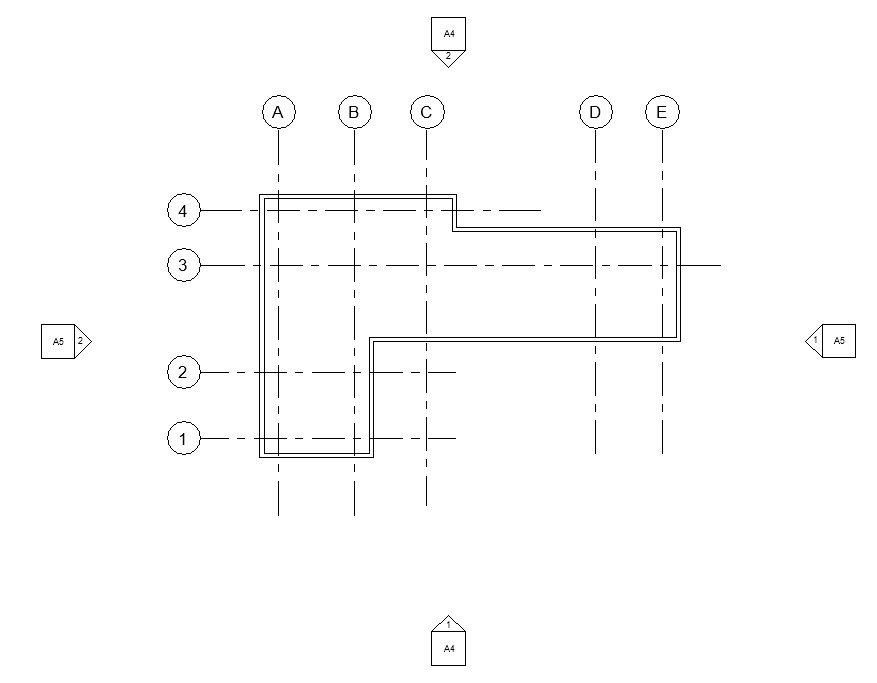
>> Setup Grids in draw panel
> Modify Grids datum: name, length, symbol, display
|
|
Columns
|
學習主旨
Lesson Keynote: |
 |
> Architectural columns and Structural columns
> Setup columns in properties Pallet
|
|
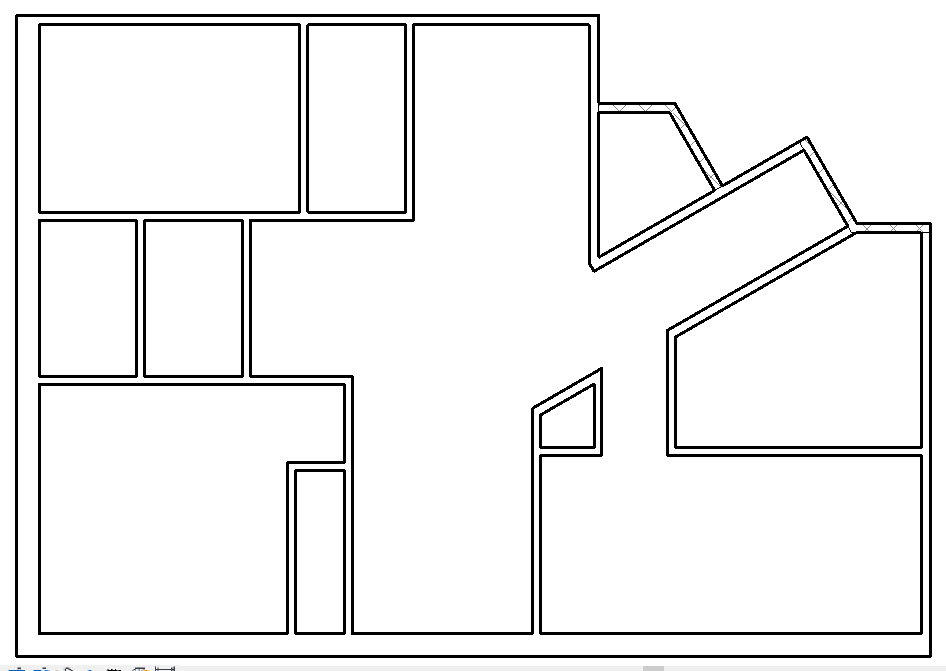
| About Walls |
學習主旨
Lesson Keynote: |
 |
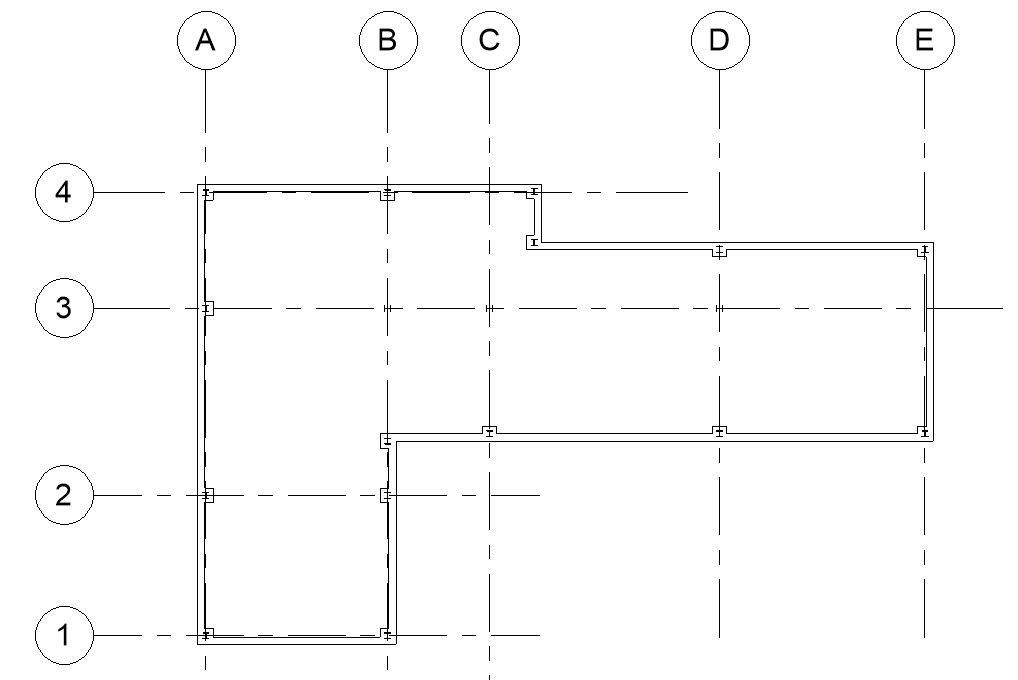
> Select wall type in properties pallet. create wall in drawing area, view in 3D view
> Using copy, Move, Trim/Extend, offset, split tool
> Modify wall joins in configuration and options bar
|
|
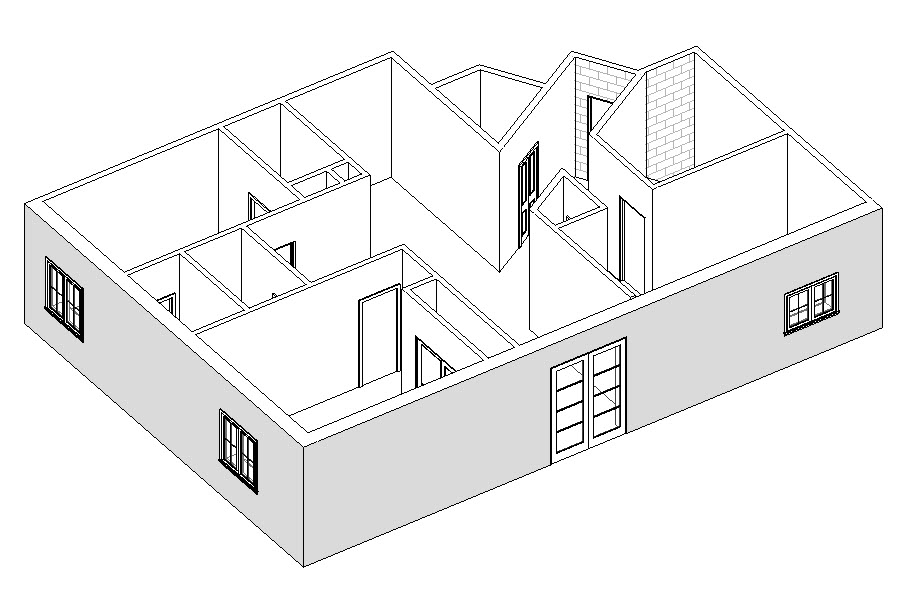
| Doors and Windows |
學習主旨
Lesson Keynote: |
 |
> Set up Wall host for Doors and windows using system family and modify
|
|
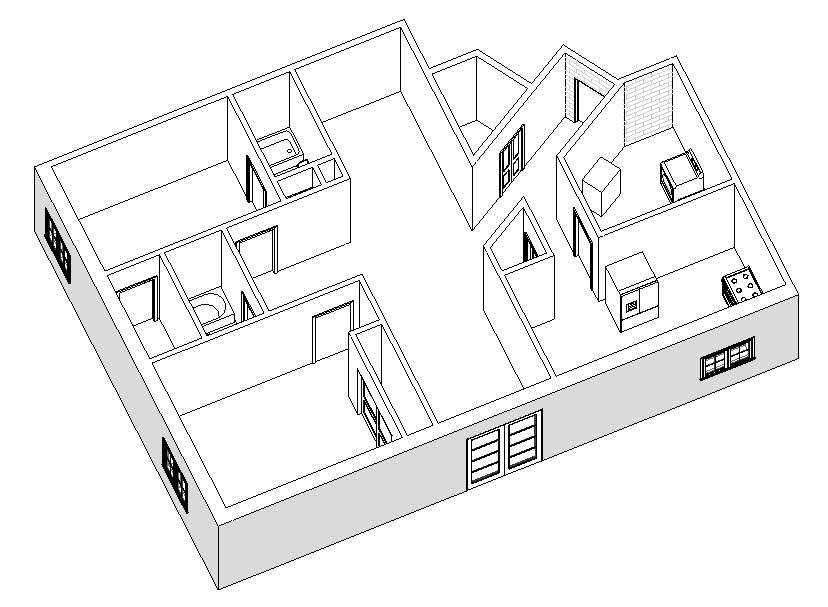
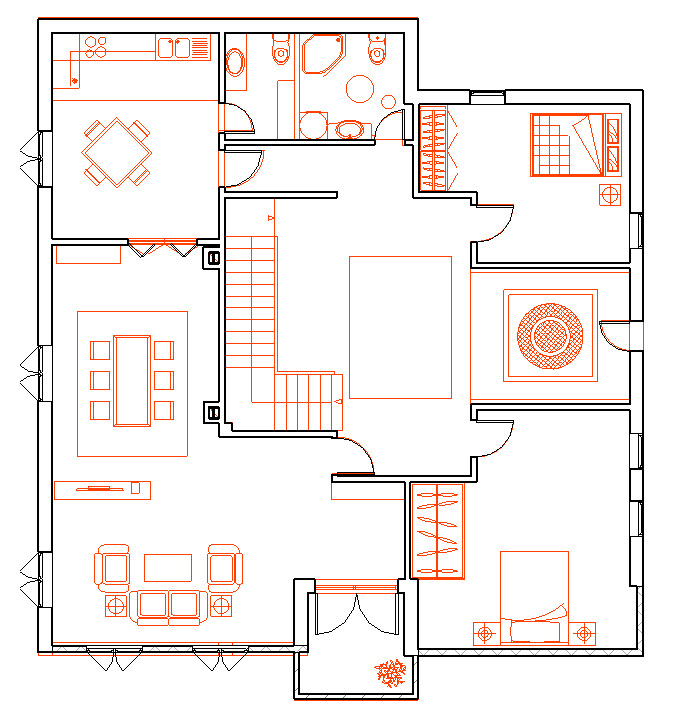
| Components |
學習主旨
Lesson Keynote: |
 |
> setup components to model building elements from system family, ex: Furnitures, plumbing fixtures etc.
|
|
| constraints |
學習主旨
Lesson Keynote: |
 |
> Demonstrate different types of contraints: basic, equality, nest, align dimension tool constraint
>
Introduce Global parameters, Reveal constraints
|
|
| Insert - Link & Import CAD |
學習主旨
Lesson Keynote: |
 |
> Link CAD file: it maintain a connection between CAD and Revit project, Revit also retrieves the CAD file when it updates
>
Import CAD file: the file become a part of the Revit model and will lose connection to source file
|
|
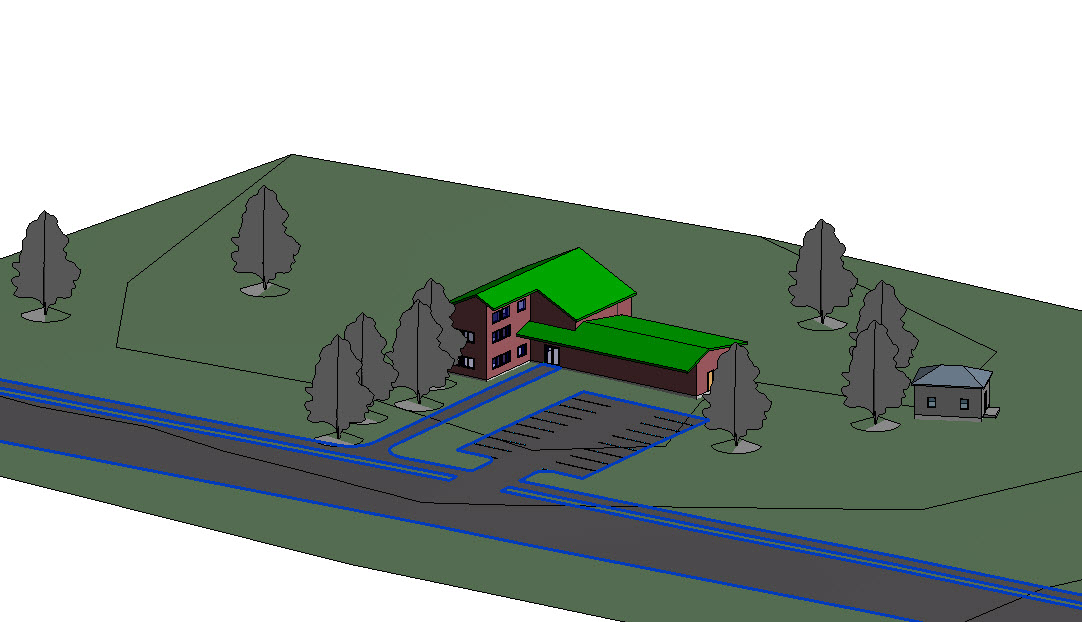
| Topography Surface |
學習主旨
Lesson Keynote: |
 |
> Toposurface tool defines a topographical surface by using points or imported data, it can be view in 3D views or site plans
|
|
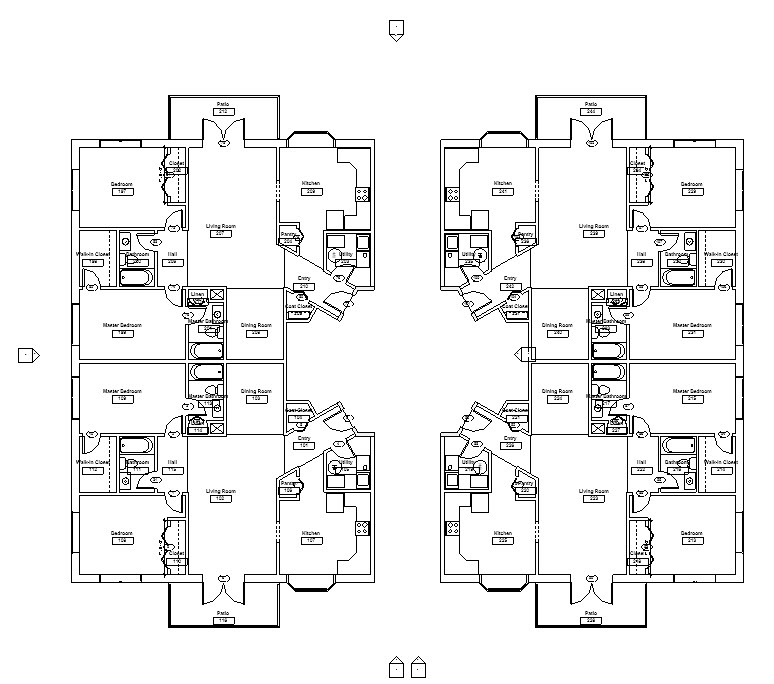
| Group + Mirror |
學習主旨
Lesson Keynote: |
 |
> Setup a collection of elements an turn into a group
>
create multiple instances of the group through project and eidt anyone instances the change will propagate to all of the others
>
Demonstrate using a line or draw temporary axis, use Mirror tool to flip a selected element or make copy of an element
|
|
| Link Revit, Rotate & Align Revit Link: , Shared Coordinates |
學習主旨
Lesson Keynote: |
 |
> When having few Revit files for the same building or when have more then one building on the same site, we can use Revit link to coordinates with it
>
To make chage of the coodinate system by using Rotate and Align tool to modify and match location
>
Using shared coordinates system to combine multiple models and files in single project and establish the relative positions of one building to another and save it in file
|
|
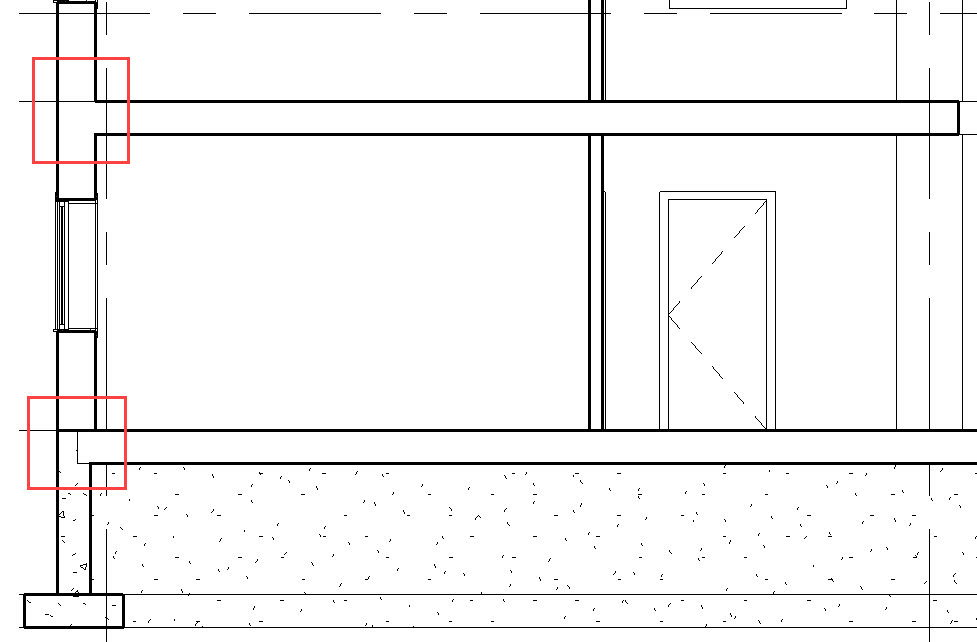
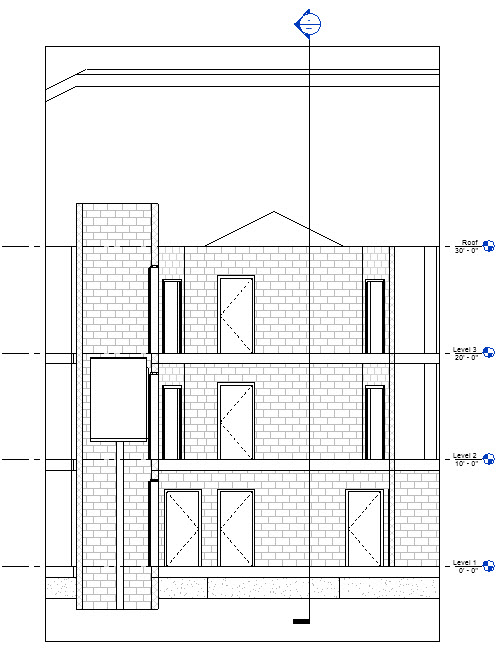
| Floors |
學習主旨
Lesson Keynote: |
 |
> Sketch base modeling of floor in sketch mode which goes around the entire building as a custom shape
>
Review floors with Section view
|
|
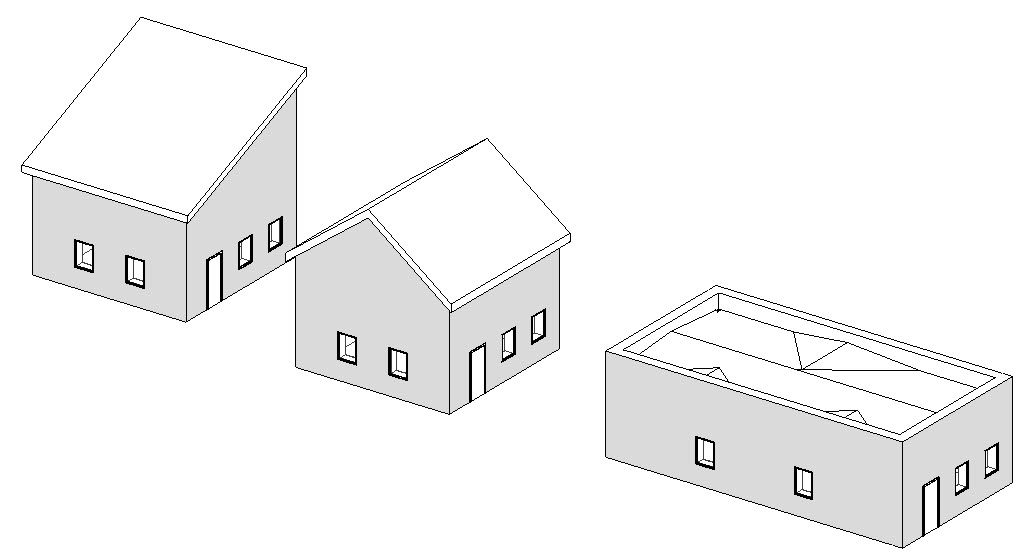
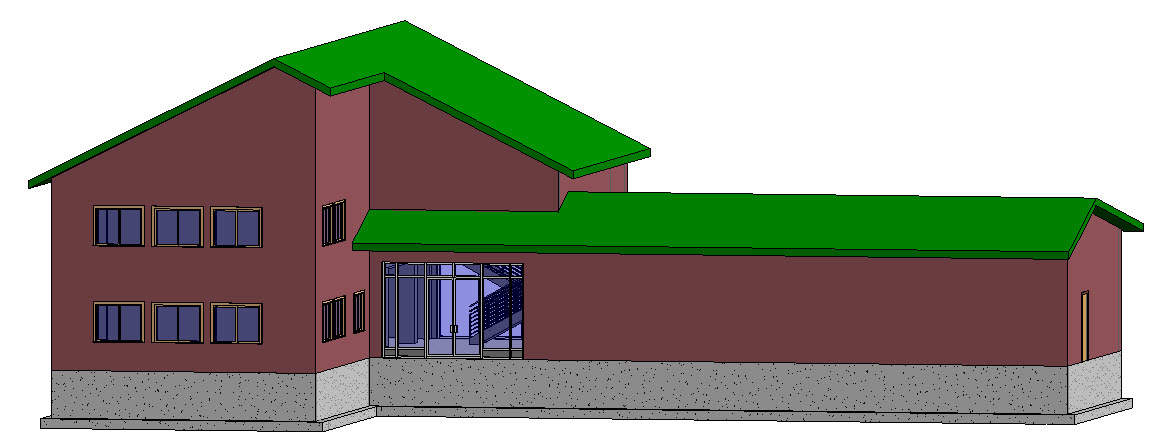
| Roofs |
學習主旨
Lesson Keynote: |
 |
> 14a Footprint Roofs
Using the building Footproit to define its boundaries and modify the roof to a different level
> 14b Attach Walls to Roofs
Attach exterior walls to the underside of the roofs by using attach Top/Base command
> 14c Extrusion Roofs
Create custom shapes curved roofs as a canopy on the end of the building by the doorway
> 14d Slope Arrows
Setup Slope Arrows inside the sketch mode to define slope in an alternative way and to use slope defineing edges
|
|
| Ceilings |
學習主旨
Lesson Keynote: |
 |
> 15a Ceilings
Build ceilings in sketch mode like floors and footprint roof
Demonstrate two methods to create ceiling: Automatic placement feature and manual method
1> 15b Adding Openings
Demonstrate 2 different types of openings: Shaft opening, Dormer opening
|
|
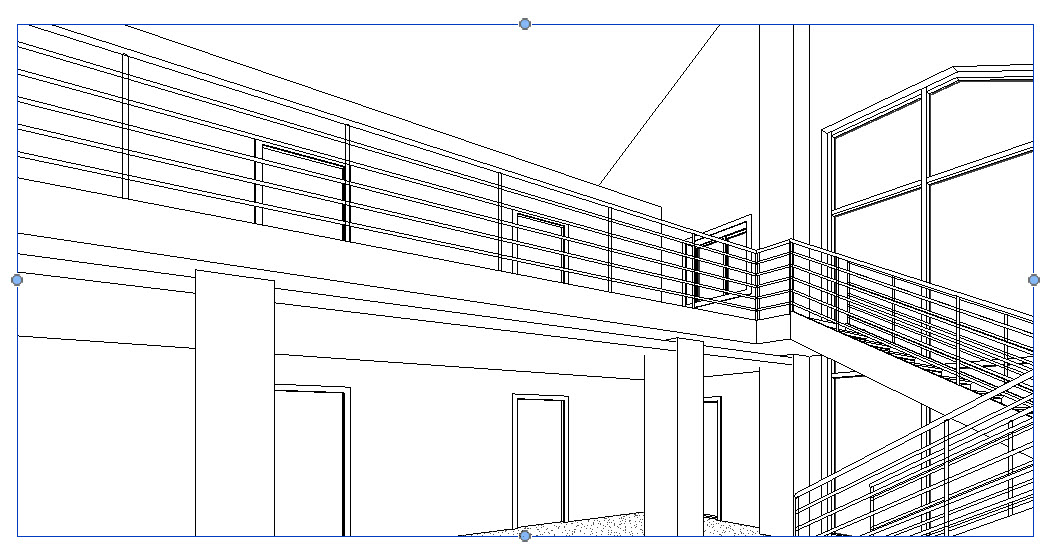
| Stairs, Railings |
學習主旨
Lesson Keynote: |
 |
> 16a Stairs
Demonstrate and create stairs and using the tile views to setup multiple views for the workflow
> 16b Railings
working with railing tool to add Guard rails and Stair Rails
Setup Canera view to navigate both rails
|
|
| Curtains, Mullions, Panels |
學習主旨
Lesson Keynote: |
 |
> 17a Curtain Walls
Setup Curtain walls as an exterior wall that attached to the building structure and modify in Edit Type
> 17b Curtain grids, Mullions, Panels
Using grids to divide the wall into panels an customize grid, place Mullion on Gridlines, Embed doors and walls within Curtain Panels
|
|
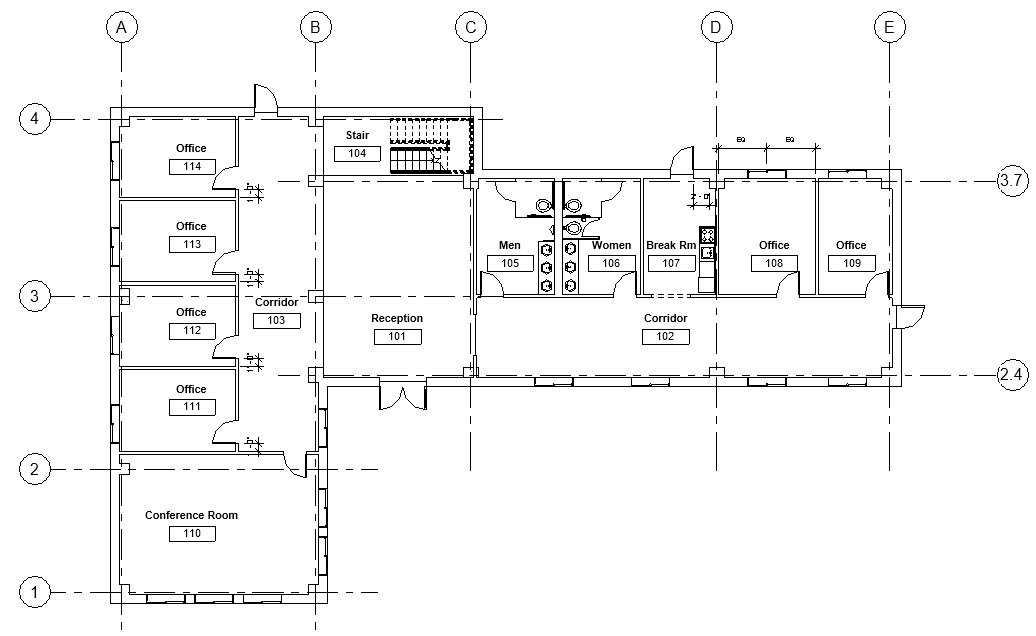
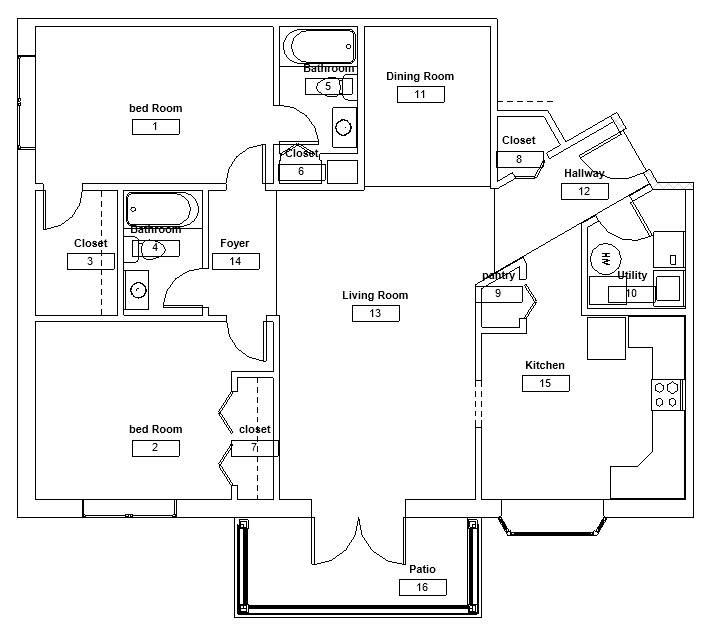
| Rooms |
學習主旨
Lesson Keynote: |
 |
Setup Room bounding element to indicate and define the boundaries of a room for room area and bolume copmutations
|
|
| Visibility Graphic Controls |
學習主旨
Lesson Keynote: |
 |
> TVG overrides is a view level modification allows us to customize the way each category of element display within a particular view
|
|
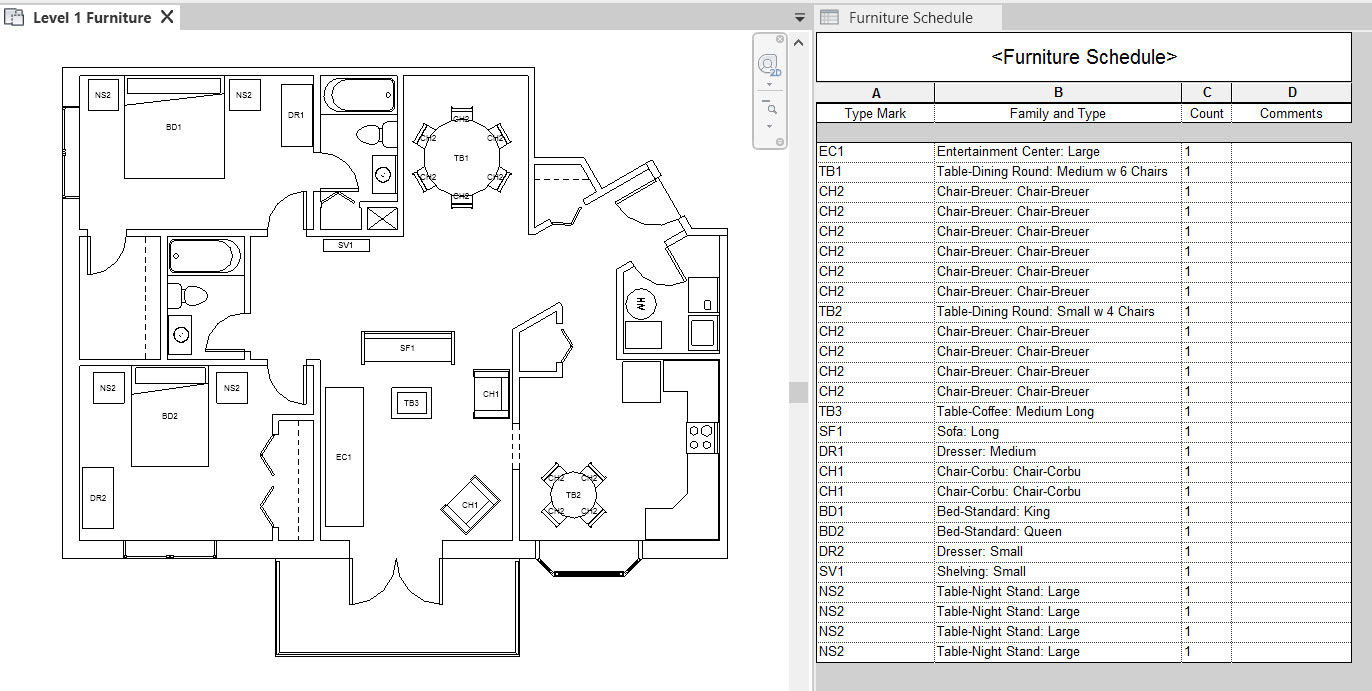
| Tags & Schedules |
學習主旨
Lesson Keynote: |
 |
>Demonstrate and use schedule to get complete list of all the items of a particular category in project
> Scuedule can be use as a tool to make selection, edit the model, place on the sheet and print out as document set
|
|
| Annotation-Text, Symbols, Legend |
學習主旨
Lesson Keynote: |
 |
> Setup Text in any view and apply leader point, Arrowhead, long notes as a simple form of annotation
> Introduce and apply standard generic symbols: North Arrow, Centerline, Bar Scales to the project
>
Demonstrate and create Door Legend, add notes and annotation the the graphic to further explain the difference between various types
|
|
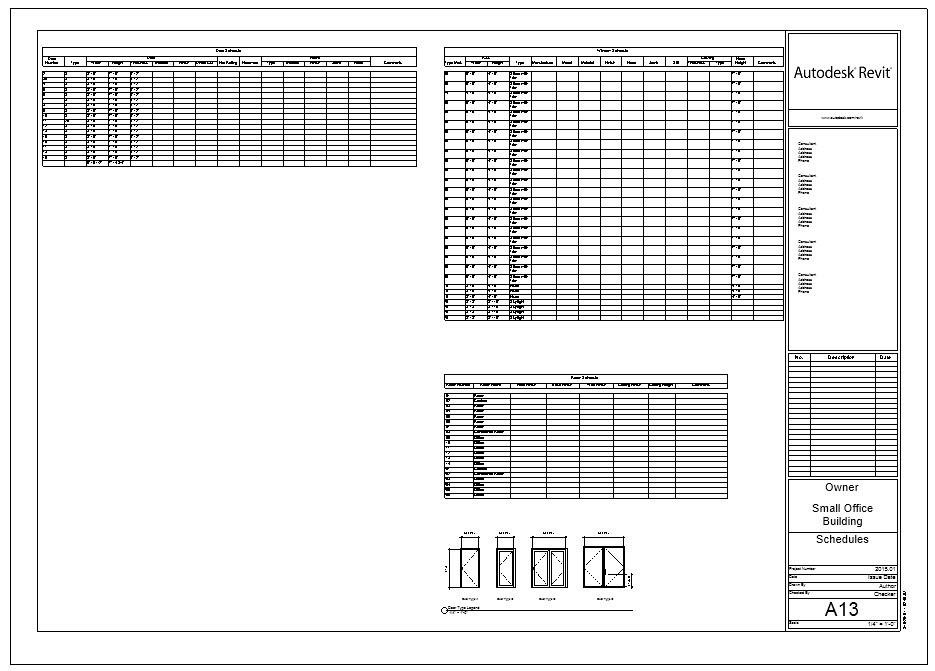
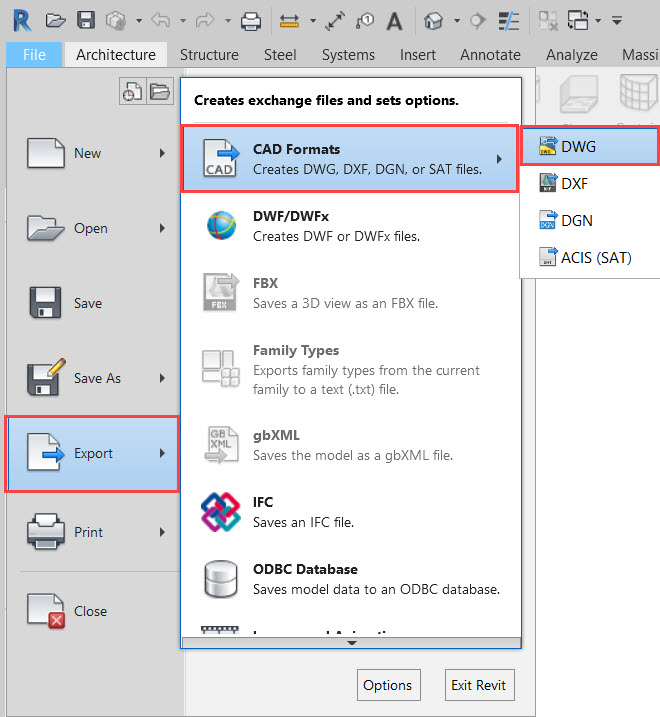
| Sheets, Export |
學習主旨
Lesson Keynote: |
 |
> Setup Sheets to creat a viewport for collecting and organizing the construction documents in a set for present and review the final project
> Demonstrate the process to export one or more Views/sheets from Revit to AutoCAD
|
|
| Family Editor |
學習主旨
Lesson Keynote: |
 |
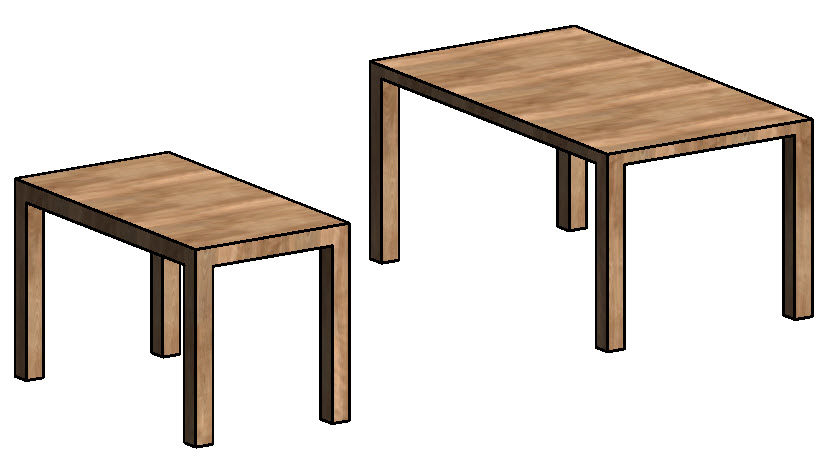
> Basic introduction and build a simple parametric family - Furniture and apply Material
|
|
| |